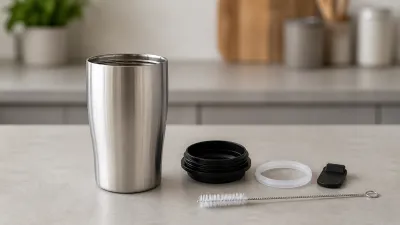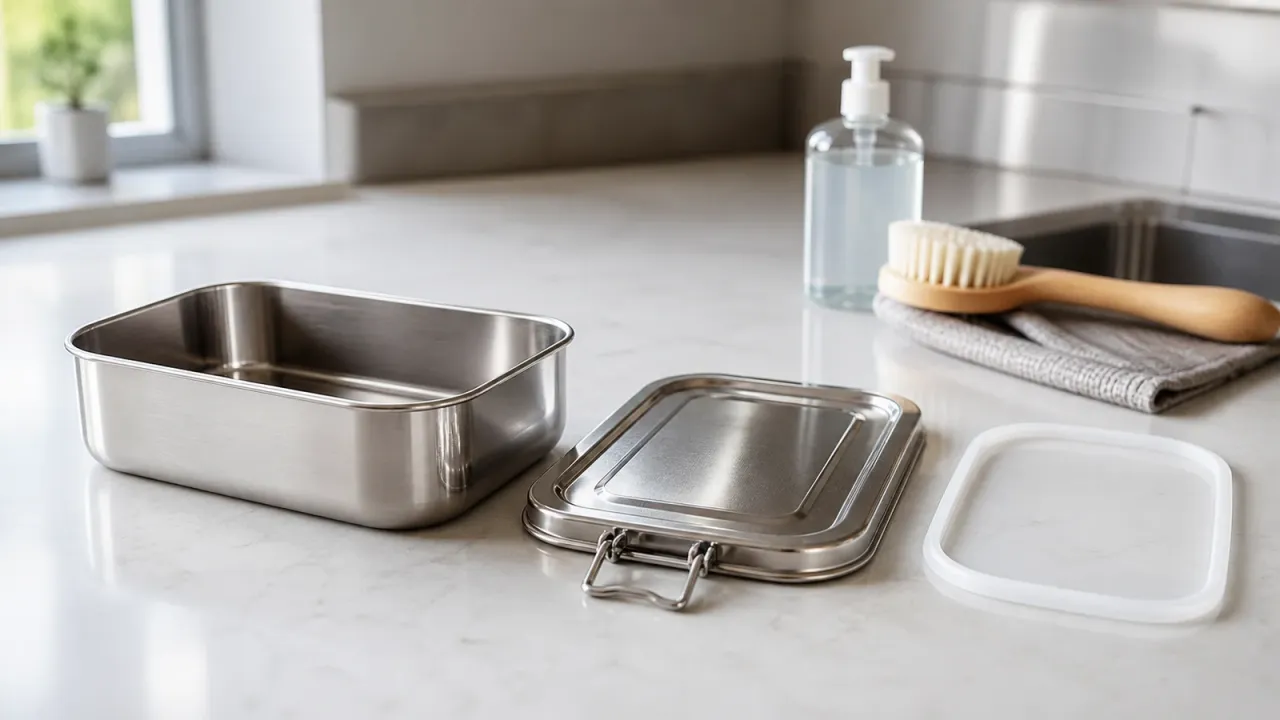
Clean a stainless steel lunch box after each use with warm water, mild dish soap, and a soft brush or non-scratch sponge. Separate the stainless body, lid, latch, and any removable silicone or plastic gasket only as the exact maker permits. Rinse every part, let it dry completely, and leave the box open until you are ready to pack it again.
That is a conservative household routine, not a hands-on test, microbial test, or sterilization guarantee. A stainless body does not tell you whether a lid, latch, gasket, magnet, coating, or insulated wall can be soaked, heated, or put in a dishwasher. When the parts or materials are unclear, the maker’s instructions control.
What should you check before cleaning?
Look up the exact lunch box model before choosing a dishwasher cycle, soaking method, cleaner, or disassembly step. The food-contact path may include more than the shiny steel tray. A lid can have silicone, plastic, a coating, magnets, a hinge, or a latch that needs a different routine from the body. An insulated or vacuum-sealed box may have walls that should not be immersed or heated.
Use this part-by-part check before washing:
| Part | What to identify | Conservative starting point |
|---|---|---|
| Stainless body or tray | Bare steel, coating, compartments, seams, and any pitting | Wash with mild dish soap, water, and a soft brush or non-scratch sponge |
| Lid and underside | Stainless, plastic, silicone, painted, magnetic, hinged, or layered construction | Wipe and brush every reachable surface; follow the maker for immersion and dishwasher use |
| Gasket or seal | Removable, replaceable, fixed, or absent | Remove only if the maker says it is removable; clean the groove and both sides when accessible |
| Latch, hinge, or vent | Open channels, springs, magnets, or narrow crevices | Brush and rinse only where the design allows; do not force a mechanism apart |
| Insulation or double wall | Vacuum or trapped air space, soldered or sealed construction | Keep to the maker’s cleaning method; do not assume boiling, soaking, oven, or dishwasher use |
| Unknown food-contact material | Unidentified lining, insert, coating, or seal | Do not pack food until the maker identifies the material and care limits |
The FDA Food Code describes reusable food-contact surfaces as smooth, free of breaks, open seams, cracks, chips, pits, and similar imperfections, and designed for effective cleaning. That is a food-service standard, not a household certification for every lunch box, but it explains why a hidden gasket groove or damaged inner surface matters.
For a broader buying and material context, see our guide to stainless steel food storage containers and the explanation of whether stainless steel containers are safe for food storage.
What is the safest daily cleaning routine?
Use this sequence for an intact box when the maker’s instructions do not require a different method:
- Empty the box promptly. Remove food scraps before they dry. Perishable food should be handled according to food-safety guidance; a clean container does not extend the safe life of leftovers.
- Rinse away loose residue. Use water to remove crumbs, sauces, and loose oils before brushing. Do not leave the closed, soiled box in a bag overnight.
- Separate approved parts. Open the lid and remove only the gasket, insert, magnet, or other component the maker identifies as removable. Keep small parts together.
- Wash each part. Use mild dish soap, water, and a soft brush or non-scratch sponge. Work around compartment corners, the lid underside, threads, hinge, latch, and gasket groove.
- Rinse until no soap remains. Check folds and channels rather than giving the box only a quick splash. Soap left in a seal or lid cavity can affect the next meal.
- Dry the assembly separately. Set the body, lid, gasket, and small parts where air can reach them. Do not close the box while droplets remain in a groove or behind a seal.
- Inspect before reassembly. Look for a torn or loose gasket, sharp edge, deep pit, cracked plastic, flaking finish, rust at a seam, or a latch that no longer closes correctly.
The Centers for Disease Control and Prevention defines cleaning as removing germs, dirt, and impurities with water, soap, and scrubbing. It also says that regular cleaning is often enough in a home and that surfaces should be cleaned before sanitizing or disinfecting. That is why ordinary washing is the default here instead of an improvised chemical treatment.
How do you clean the stainless body and lid?
Start with the food-contact surfaces, then clean the exterior and hardware. Use a soft brush for corners and a non-scratch sponge or soft cloth for broad surfaces. A small brush can reach the underside of a rolled rim, but do not dig into a seal with a sharp pick.
For dried food, wet the area with soapy water and give it time to soften before brushing again. Do not scrape with a knife, metal spatula, or other hard edge. Stainless steel is corrosion resistant, but scratches and transferred metal particles can make a surface harder to inspect and keep clean.
Pay special attention to:
- the inside corners of divided compartments
- the rolled rim and underside of the lid
- the hinge side and latch contact points
- the area under a silicone lip or plastic insert
- seams, welds, and any drain or vent opening
Do not put a hot or recently heated container under a sudden stream of cold water if the product has been used for warm food. Let it cool to a safe handling temperature first. Do not use a stovetop, oven, microwave, or boiling-water treatment as a cleaning shortcut unless the exact maker expressly approves that operation for the exact model and parts.
How do you clean a gasket, latch, or groove?
Clean the seal and hardware as carefully as the steel tray. A lid can look clean while oil or food remains in the gasket channel, latch recess, or hinge. That hidden residue is a common reason a box smells after the body has been washed.
- Check the care diagram or manual to see whether the gasket can be removed. If it is fixed, wipe and brush the exposed edges without prying it out.
- If removal is approved, wash the gasket separately with mild dish soap, water, and a soft brush. Clean the channel in the lid and the surfaces behind the seal.
- Rinse both the gasket and its groove. Look for a slippery film, food particles, or trapped foam.
- Let the seal and lid dry separately. Refit the gasket only when it is fully dry and sits in the same orientation shown by the maker.
- Open and close the latch gently after cleaning. Do not force a spring, magnet, hinge pin, vent, or other mechanism that the maker does not identify as serviceable.
The FDA Food Code’s cleanability principle is useful here: a reusable food-contact surface needs to be reachable and free from imperfections that can harbor residue. A gasket is not stainless steel, but it can still be part of the food-contact path. If you cannot clean or dry it, ask the maker about a replacement rather than sealing it in place and continuing to use it.
Can a stainless steel lunch box go in the dishwasher?
Only when the exact maker says the exact lunch box and its parts are dishwasher-safe. The alloy name alone is not a dishwasher rating. A steel tray may tolerate a dishwasher while a painted lid, magnet, silicone seal, insulated wall, or latch does not.
Current maker instructions show why the details matter:
- LunchBots lists its Large Trio as dishwasher-safe and describes a 100% stainless steel interior, including the lid. It separately warns that the box is not leakproof and says an optional Dots cover can be washed while attached to the lid.
- U-Konserve lists a stainless steel and platinum-grade silicone round container as dishwasher-safe, with its own care instructions. Its silicone lid page specifies top-rack care and says the lid is made to fit U-Konserve products.
- PlanetBox tells users to remove magnets before washing and to dry the lunch box fully before putting the magnets back. Its FAQ also distinguishes dishwasher-safe lunch boxes from insulated stainless steel flasks that are hand-wash only.
These are examples, not interchangeable instructions. Before using a dishwasher, verify the model, rack position, temperature or cycle limits, lid and gasket permission, removable accessories, and whether magnets or coatings must be removed. If you cannot find the exact care information, hand washing is the cautious default.
How do you remove odors, oily residue, or stains?
Treat an odor as an assembly problem rather than assuming the stainless body is the source. Wash the body, lid underside, gasket groove, latch, and every approved removable part. Oily foods and sauces can leave a film in a seal even when the steel looks clean.
Start with another normal wash using mild dish soap, water, and a soft brush. Rinse thoroughly, dry the parts separately, and inspect the gasket before closing the box. If the odor remains, repeat the approved disassembly once and check for a hidden channel or damaged seal.
For a spot or water mark, follow the exact maker’s guidance for that finish. Do not treat a universal vinegar, baking soda, bleach, peroxide, tablet, or boiling-water recipe as safe for every lid, seal, coating, or insulated wall. A method published for one product may damage another. If a maker permits a specialty cleaner or soak, follow its product label and the maker’s instructions, then rinse as directed.
Never mix cleaning products. CDC guidance says to follow the product label, ventilate when directed, and not mix products or chemicals. Do not combine bleach with vinegar, ammonia, or another cleaner, and do not pour a household disinfectant into a lunch box that will later hold food unless the product label and exact maker expressly cover that food-contact use.
If a smell or film persists in a part that cannot be reached, cleaned, and dried, contact the maker for a replacement part or retire the assembly. More aggressive scrubbing is not a repair for an inaccessible cavity.
How should you dry and store it?
Drying is part of cleaning. Set the open body, lid, gasket, and small parts on a clean rack so air can reach the food-contact surfaces. Hold the lid at an angle if needed to drain water from a hinge or recess. Do not close the box, put the gasket back into a wet groove, or place a magnet on a damp lid.
Before storage:
- check that no droplets remain under the rim, gasket, latch, or lid insert
- leave removable seals out or loosely fitted only when the maker allows that storage method
- keep the box open or separated long enough for hidden channels to dry
- keep magnets, sleeves, and decorative covers away from water when their instructions require it
- inspect the box again before packing food
Do not soak an insulated or vacuum-sealed lunch box unless its maker says that the construction can be immersed. Water inside a sealed wall is a product problem, not a cleaning step. Do not use heat to speed drying unless the exact parts and appliance are approved for it.
When should you stop using the lunch box?
Stop and contact the maker, replace the failed part, or retire the box when damage prevents a complete clean-and-dry cycle. Watch for:
- a deep pit, crack, open seam, rough weld, sharp edge, or corrosion on a food-contact surface
- a torn, stretched, sticky, or loose gasket that cannot be seated correctly
- a latch, hinge, or lid that no longer closes as designed
- peeling paint, coating, plastic, or silicone in the food-contact path
- exposed insulation, a leaking double wall, or a new bulge
- persistent odor, mold-like material, or residue in an inaccessible passage
- an unidentified liner, gasket, or coating for which the maker cannot confirm food-contact use
The FDA Food Code explains that cracks, pits, and similar imperfections can make food-contact surfaces difficult to clean. That does not mean every cosmetic mark makes a household lunch box immediately unsafe, and it is not a diagnosis from a photograph. It does mean that a damaged surface deserves inspection and a maker’s answer instead of repeated abrasive cleaning.
Does cleaning make a lunch box food-safe?
Cleaning removes soil and most germs from a surface, but it is not the same as sanitizing or disinfecting, and it does not make unknown or damaged materials suitable for food. CDC says to clean first and to use a suitable, labeled product if sanitizing or disinfecting is actually needed. Follow the exact lunch box maker and product-label instructions for any such step.
If the box held raw meat, an allergen, or food from someone who is ill, clean it promptly and follow current food-safety guidance for the situation. Do not invent a stronger chemical mix because a smell remains. If the food-contact surface cannot be cleaned, rinsed, and dried completely, do not use it for another meal until the maker resolves the issue.
Also keep the container separate from the food’s storage limits. Prompt refrigeration, suitable temperatures, and the food’s own storage time still matter. A stainless steel lunch box does not make food safe after it has been left out too long.
For adjacent questions, see our best stainless steel water bottles guide for lid and seal care, and how stainless steel soap works for why a steel object is not a substitute for detergent.
Frequently asked questions
How often should I clean a stainless steel lunch box?
Wash it after every use, especially after moist, oily, sweet, dairy, meat, or egg-containing food. Rinsing is not enough when a film or residue remains. Clean the lid, gasket, latch, and approved inserts along with the steel body.
Can I leave food in the lunch box overnight?
Do not use the lunch box as a reason to extend food’s safe storage time. Empty and clean it promptly, and follow current food-storage guidance for perishable food. A closed container can hide residue and odor while it sits.
Should I remove the silicone gasket every time?
Remove it as often as the exact maker directs, and more often when the box held food that can leave oil or residue. Never pry out a fixed seal. If the gasket is removable, clean and dry its groove and both sides before reinstalling it.
Can I use vinegar or baking soda?
Not as a universal recipe. Some makers publish a vinegar treatment for a specific product, while another maker may restrict acids, abrasives, or cleaners on a finish or seal. Use only a method the exact maker permits, keep products separate, and rinse thoroughly.
What if the lunch box still smells after washing?
Clean the full assembly again, including every approved gasket, groove, latch, and lid channel. Dry the parts separately and inspect for damage. If the odor persists in an inaccessible part, ask the maker about a replacement or stop using the box.
Can I clean an insulated stainless steel lunch box the same way?
Not necessarily. Insulated and vacuum-sealed construction can have different immersion, heat, and dishwasher limits. Follow the exact maker’s instructions and keep the box out of boiling water, an oven, or a dishwasher unless the model page expressly permits it.
Sources and method
This article was checked against current manufacturer care pages and current public-health guidance on August 22, 2026. It is a research-based household guide, not a hands-on product test, microbial count, diagnosis, or promise of sterilization. The exact maker’s instructions control whenever they differ from this general routine.